Last Updated on 18 July 2025 by Daniel Midlands
Table of Contents
Quick Start Guide (TL;DR)
Need to change your Ring doorbell WiFi right now? Here’s the express version:
Time Required: 5-10 minutes
Difficulty: Easy
Tools Needed: Smartphone with Ring app, new WiFi password
Quick Steps:
- Open Ring app → Select your doorbell → Device Health
- Tap “Change WiFi Network” or “Reconnect to WiFi”
- Put doorbell in setup mode (press setup button once)
- Select new network → Enter password → Wait for connection
Before You Start:
- Ensure your Ring app is updated to the latest version
- Check your doorbell’s battery level (charge if below 30%)
- Verify your new WiFi network broadcasts on 2.4GHz frequency
- Have your network password ready
Common Issues: If setup mode won’t activate, hold the setup button for 20 seconds to perform a hard reset. If your network doesn’t appear, check it’s broadcasting on 2.4GHz (most Ring doorbells don’t support 5GHz-only networks).
Need more detail? Continue reading for comprehensive instructions, model-specific guidance, and troubleshooting tips.

Change WiFi on Ring doorbell with confidence using our comprehensive UK guide. Whether you’ve upgraded your broadband, switched providers, or moved house, updating your Ring doorbell’s network settings is simpler than you might think.
Your Ring doorbell relies on a stable WiFi connection to deliver security alerts, stream live video, and record footage. When you change wifi on ring doorbell settings, you’re ensuring uninterrupted protection for your home. The good news? You can change ring doorbell wifi without removing the device from its mounting bracket.
This complete guide covers every Ring doorbell model available in the UK, from the original Ring Video Doorbell to the latest Ring Pro 2. We’ll walk you through the entire process step-by-step, including preparation, troubleshooting, and optimisation tips that work specifically with UK broadband providers like BT, Sky, Virgin Media, and TalkTalk.
Most Ring doorbell WiFi changes take just 5-10 minutes to complete. You’ll need your new network name (SSID), password, and the Ring app installed on your smartphone or tablet. Our method works for all scenarios: new router installations, password changes, network upgrades, and house moves.
No worries, though – it’s easier than you’d think. All you need to do is head into the Ring app, pop over to the Device Health section, and select “Change Wi-Fi Network”. From there, the app walks you through it. Just make sure you’re near the doorbell and have the new WiFi password to hand.
This guide is here to make the whole process painless. Whether you’re a tech whizz or more of a “where’s the on switch?” type, we’ve broken everything down step-by-step in plain English. It’s especially geared towards those of us in the UK who want to keep things connected and secure, minus the faff.
You’ll learn how to switch your Ring Video Doorbell over to a new WiFi network, how to avoid common hiccups, and how to keep the connection running smoothly in the long term. By the end, you’ll be confidently managing your doorbell’s connectivity like it’s no big deal because really, it isn’t.

What is the Ring Doorbell
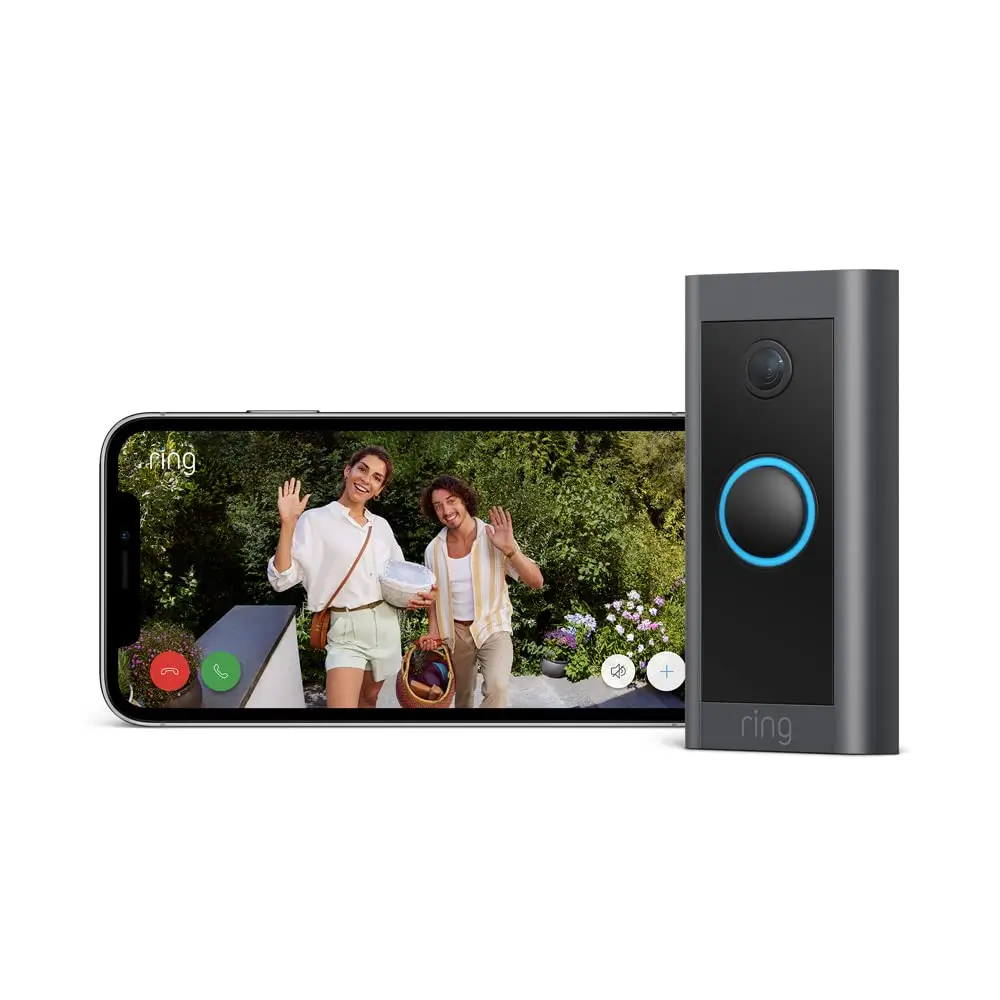
The Ring Doorbell, a cutting-edge innovation by Amazon, revolutionizes how we think about home security. This remarkable device, easily installed at your front door, functions as a standard doorbell and a sophisticated security camera. Its core features include high-definition video recording, real-time notifications, and two-way audio communication. This means that whether you’re in the comfort of your living room or halfway across the world, you can see, hear, and speak with whoever is at your door directly from your smartphone or tablet.
The device’s motion detection feature alerts you even before the bell is rung, providing an added layer of security. Moreover, the Ring Doorbell integrates seamlessly with Amazon’s Echo devices, allowing you to monitor your doorway with voice commands. The combination of convenience, security, and advanced technology makes the Ring Doorbell a must-have for modern homeowners looking to enhance their home security system.
For those interested in purchasing the Ring Doorbell, Amazon UK offers an accessible and convenient platform. You can find it at this link*, where a wealth of information and customer reviews are available to help you make an informed decision. Amazon’s user-friendly interface and detailed product descriptions ensure you have all the necessary information at your fingertips. Additionally, Amazon offers competitive pricing, fast shipping options, and reliable customer service, making purchasing hassle-free.
When you buy from Amazon, you also see how the Ring Doorbell fits into the broader ecosystem of Amazon smart home products, allowing you to plan future upgrades or integrations within your home automation setup. Purchasing from Amazon ensures a secure transaction and a straightforward path to making your home safer and more intelligent.

Ring Solar Charger (2nd Gen) for Battery Doorbells, Video Doorbell (2nd Gen)
- Extend the battery life of your Video Doorbell (2nd Gen) with the help of a solar power source
- Install in a location where it can receive at least 3-4 hours of direct sunlight per day for best performance
- This product only works with Ring Video Doorbell (2nd Gen). It is not compatible with other Video Doorbell models.
New starting from: 39.99
Buy on AmazonBefore You Begin: Essential Preparation
Proper preparation prevents problems. Taking five minutes to check these requirements will save you frustration later and ensure a smooth WiFi change process.
Check Your Ring Doorbell Model
Different Ring doorbell models have slightly different setup procedures. Identify your model before starting:
- Ring Video Doorbell (1st Gen): Rectangular shape, removable battery pack
- Ring Video Doorbell 2: Similar to 1st gen but with improved video quality
- Ring Video Doorbell 3/3 Plus: More compact design, advanced motion detection
- Ring Video Doorbell Pro/Pro 2: Hardwired models, no battery compartment
- Ring Video Doorbell 4: Latest battery model with colour night vision
- Ring Video Doorbell Wired: Budget hardwired option
Verify Network Compatibility
Critical: Most Ring doorbells only work with 2.4GHz WiFi networks. Many modern routers broadcast both 2.4GHz and 5GHz signals. Check your router settings to ensure 2.4GHz is enabled.
UK Broadband Provider Notes:
- BT Smart Hub: Usually broadcasts both frequencies automatically
- Sky Q Hub: May need manual 2.4GHz activation in settings
- Virgin Media Hub: Check “WiFi settings” for dual-band options
- TalkTalk Router: Often requires separate 2.4GHz network setup
Gather Required Information
You’ll Need:
- New WiFi network name (SSID)
- New WiFi password (case-sensitive)
- Ring app installed and logged in
- Smartphone or tablet connected to new network
Check Device Status
Battery Level: Ensure your Ring doorbell has at least 30% battery charge. Low battery can cause setup failures.
App Version: Update the Ring app to the latest version. Older app versions may not support newer setup methods.
Signal Strength: Stand near your doorbell location and check WiFi signal strength on your phone. Weak signals cause connection problems.
Understanding the Basics: What You Need to Know First
Your Ring Doorbell is critical to your home’s security system, allowing you to monitor your doorstep from anywhere. A stable WiFi connection is key to ensuring it functions correctly. But why might you need to change your Ring Doorbell’s WiFi? The reasons vary – you might be upgrading to a faster network, replacing your router, or addressing connectivity issues. Whatever the case, the process is straightforward, and you’ll soon have your device back up and running.
Before you start, ensure your ringbell app is updated to the latest version, which guarantees access to the latest features and fixes. Also, have your new WiFi network name and password at hand. If you need clarification on these details, they’re usually found on the back of your router or in the documentation provided by your internet service provider.
Understanding Network Requirements for Ring Doorbells
Your WiFi network’s technical specifications directly impact your Ring doorbell’s performance. Understanding these requirements helps ensure reliable connectivity and optimal video quality.
2.4GHz vs 5GHz: What You Need to Know
Most Ring doorbells only support 2.4GHz WiFi networks. This limitation affects which network you can use and how you configure your router.
2.4GHz Networks:
- Longer range, better wall penetration
- Slower speeds but more stable for smart devices
- Required for Ring Video Doorbell 2, Wired, and Battery Doorbell Plus
- Works with all Ring models
5GHz Networks:
- Faster speeds, shorter range
- Less congested frequency band
- Supported by Ring Pro, Pro 2, and Elite models only
- May not reach outdoor doorbell locations effectively
UK Router Configuration:
Most UK broadband providers supply dual-band routers that broadcast both frequencies. Check your router’s admin panel or contact your provider if you’re unsure about your network setup.
Signal Strength Requirements
Minimum Requirements:
- Signal strength: -65 dBm or stronger
- Upload speed: 1 Mbps minimum (2 Mbps recommended)
- Download speed: 2 Mbps minimum
Testing Signal Strength:
Stand at your doorbell location with your smartphone. Check WiFi signal strength in your phone’s settings. If you see fewer than 3 bars, consider WiFi range extenders or mesh network upgrades.
UK Broadband Provider Considerations
BT Smart Hub 2:
- Automatically manages 2.4GHz and 5GHz
- Strong signal range suitable for most doorbell locations
- May require port forwarding for optimal Ring performance
Sky Q Hub:
- Sometimes prioritises 5GHz connections
- Check “Advanced Settings” to ensure 2.4GHz remains active
- Consider disabling “Smart WiFi” for Ring device compatibility
Virgin Media Hub 4:
- Excellent range and speed
- Dual-band management usually works well with Ring devices
- May need manual 2.4GHz network creation for older Ring models
TalkTalk and Plusnet Routers:
- Often require manual 2.4GHz network setup
- Check firmware updates for improved Ring compatibility
- Consider upgrading to newer router models if experiencing issues

Step-by-Step Guide to Changing Your WiFi Network
Follow these detailed instructions to change your Ring doorbell’s WiFi network. The process varies slightly depending on your Ring model, but these universal steps work for all devices.
Universal Method (All Ring Models)
Step 1: Access the Ring App
Open the Ring app on your smartphone or tablet. Ensure you’re logged into the account associated with your Ring doorbell. If you’ve recently changed phones, you may need to re-authenticate your account.
Tip: Connect your phone to the new WiFi network before starting. This ensures the app can communicate with your doorbell during setup.
Step 2: Select Your Ring Doorbell
From the main dashboard, tap on the Ring doorbell you want to update. If you have multiple Ring devices, double-check you’ve selected the correct one. The device name appears at the top of the screen.
Multiple Devices: If managing several Ring doorbells, consider renaming them with location-specific names (e.g., “Front Door,” “Back Gate”) to avoid confusion.
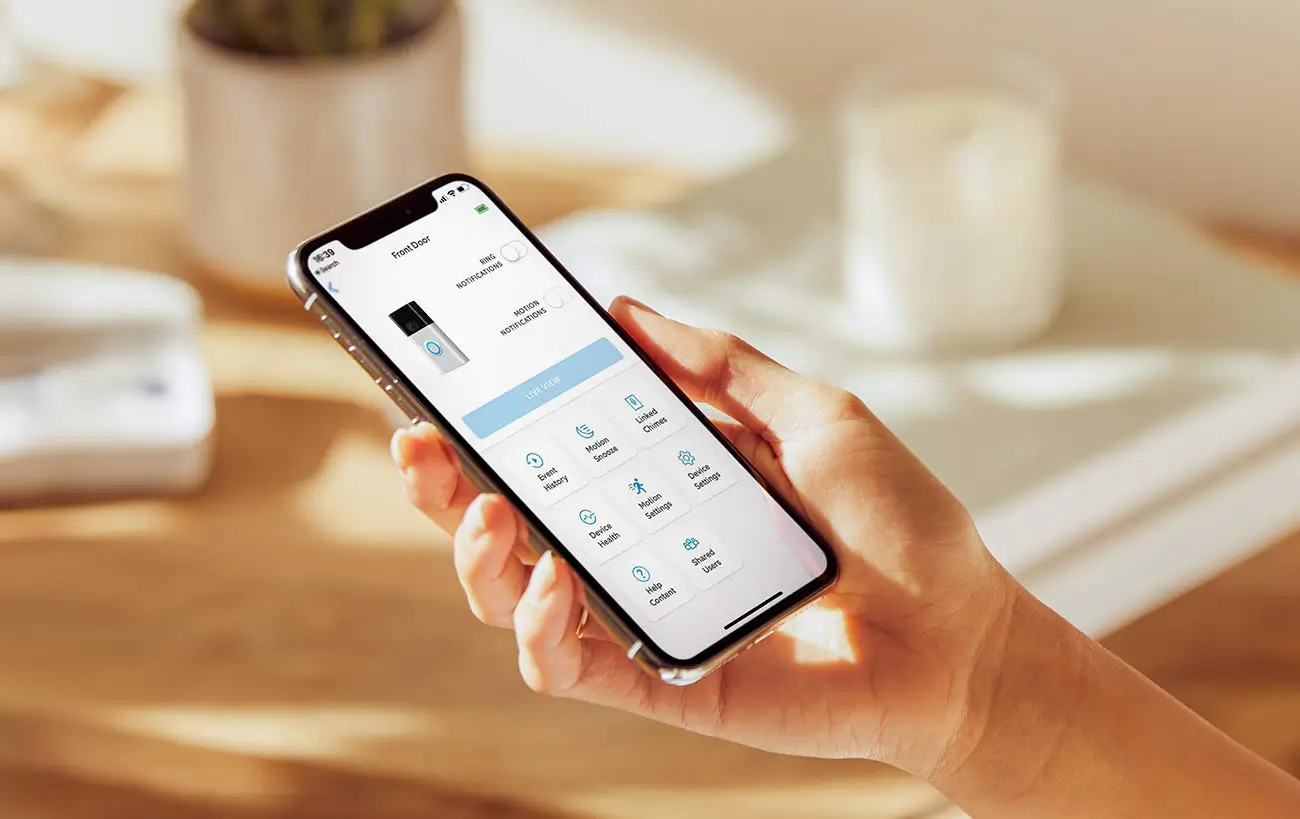
Step 3: Navigate to Device Health
Tap “Device Health” from the device menu. This section shows your doorbell’s current status, including battery level, signal strength, and network connection details.
Alternative Path: Some Ring app versions show “Device Settings” instead. Look for network-related options in either section.
Step 4: Initiate WiFi Change
Look for “Change WiFi Network,” “Reconnect to WiFi,” or “Change Network” options. Tap this button to start the network change process.
Important: You must be within 10 metres of your Ring doorbell for the next steps. The app needs to communicate directly with the device.
Step 5: Activate Setup Mode
Your Ring doorbell needs to enter setup mode to accept new network settings. The activation method depends on your model:
For Ring Video Doorbell (1st & 2nd Gen):
- Remove the doorbell from its mounting bracket
- Locate the orange setup button on the back
- Press the button once (don’t hold it down)
- Look for a spinning white light on the front
For Ring Video Doorbell 3/3 Plus/4:
- Remove the faceplate using the provided tool
- Find the black setup button on the front
- Press once and release immediately
- Watch for the spinning light indicator
For Ring Video Doorbell Pro/Pro 2:
- Locate the setup button on the right side
- Press once without holding
- The LED ring will start spinning
For Ring Video Doorbell Wired:
- Press the setup button on the front once
- Wait for the light pattern to change
Step 6: Select Your New Network
The Ring app will scan for available networks. Select your new WiFi network from the list. If your network doesn’t appear, ensure it’s broadcasting on 2.4GHz and try refreshing the list.
Hidden Networks: If your network is hidden, tap “Join Other Network” and manually enter the SSID.
Step 7: Enter Network Credentials
Type your WiFi password carefully. Passwords are case-sensitive, so double-check capitalisation and special characters. The app will show dots instead of characters for security.
Password Tips:
- Avoid spaces at the beginning or end
- Check for accidental caps lock
- Some special characters may cause issues
Step 8: Complete Connection
Tap “Continue” and wait for your Ring doorbell to connect. This process typically takes 1-3 minutes. The doorbell’s light will change from spinning to solid when connection succeeds.
Success Indicators:
- Solid blue light on the doorbell
- “Connected” status in the Ring app
- Live view becomes available
Model-Specific Variations
Ring Pro Models: These hardwired doorbells may require a brief power cycle. If setup fails, turn off power at the breaker for 30 seconds, then restore power and retry.
Battery Models: If battery level drops below 20% during setup, the process may fail. Charge the battery and restart the procedure.
Older Models: First-generation Ring doorbells may take longer to connect. Allow up to 5 minutes for the initial connection.
Troubleshooting Setup Mode
Setup Mode Won’t Activate:
- Hold the setup button for 20 seconds to perform a hard reset
- Wait 2-3 minutes for the doorbell to restart
- Try the setup process again
No Spinning Light:
- Check battery level (charge if necessary)
- Ensure you’re pressing the correct button
- Some models have very subtle light indicators
App Can’t Find Doorbell:
- Move closer to the device (within 5 metres)
- Restart the Ring app
- Check your phone’s WiFi connection
Troubleshooting Common Issues
Even with the best intentions, you might encounter a few bumps. Here are some common issues and how to resolve them:
Issue 1: Device Not Connecting to WiFi
If your gadget struggles to connect to the new network, check your WiFi signal strength first. If it’s weak where your Ring is located, consider moving your router closer or investing in a WiFi extender.
Issue 2: Forgotten WiFi Password
Need help remembering your WiFi password? You can find it on your router or the internet service provider’s documentation. Alternatively, you can reset your router, but remember this will disconnect all devices currently connected.
Issue 3: Ring App Issues
If the app is unresponsive or buggy, update it to the latest version. If the problem persists, uninstall and reinstall the app.
Issue 4: Network Not Appearing in Ring App
Symptoms: Your WiFi network doesn’t show up in the available networks list during setup.
Solutions:
- Verify your network broadcasts on 2.4GHz frequency
- Check if your network name contains special characters (remove if present)
- Ensure your router isn’t set to “hidden” mode
- Move closer to your router during setup
- Restart your router and wait 2 minutes before retrying
Issue 5: “Incorrect Password” Error
Symptoms: Ring app reports password is incorrect despite entering it correctly.
Solutions:
- Double-check password capitalisation and special characters
- Try typing password in a text app first, then copy-paste
- Ensure no extra spaces before or after the password
- Check if your router has guest network restrictions
- Temporarily disable special characters in your WiFi password
Issue 6: Setup Completes But Doorbell Goes Offline
Symptoms: Initial setup succeeds but doorbell shows offline within hours.
Solutions:
- Check signal strength at doorbell location
- Verify router firewall isn’t blocking Ring traffic
- Ensure power supply is adequate (for hardwired models)
- Check for interference from other 2.4GHz devices
- Consider upgrading router firmware
Issue 7: Multiple Ring Devices Causing Conflicts
Symptoms: Other Ring devices disconnect when adding new doorbell to network.
Solutions:
- Stagger device setup (add one device per day)
- Ensure router can handle multiple simultaneous connections
- Check bandwidth limitations with your broadband provider
- Consider upgrading to mesh network system
- Verify each device has unique device names
Issue 8: Ring App Crashes During Setup
Symptoms: Ring app closes unexpectedly during WiFi change process.
Solutions:
- Force-close and restart the Ring app
- Clear Ring app cache (Android) or reinstall app (iOS)
- Ensure your phone has adequate storage space
- Update your phone’s operating system
- Try setup from a different device
Maintaining Optimal Performance
After successfully changing your Video Doorbell’s WiFi network, it’s crucial to maintain its performance. Regularly check for app and firmware updates, including important security patches and performance improvements. Also, keep an eye on your WiFi network’s health. A robust and stable connection is essential for your Video Doorbell to function effectively.
Changing your Doorbell’s WiFi network is a straightforward process that you can accomplish easily. Following the steps outlined in this guide and addressing common issues will ensure your device remains an effective part of your home’s security setup. Remember, staying connected and secure in the digital age is not just about having the right tools but knowing how to use them effectively.
To ensure your Ring Doorbell continues to function optimally, it’s essential to monitor its battery health. If you notice frequent disconnections or reduced performance, it might be time to replace the battery. Consider purchasing a Ring Doorbell battery to keep your device running smoothly.
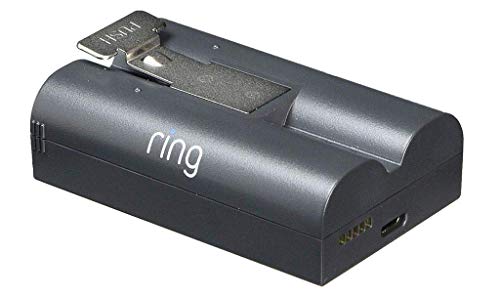
Ring Rechargeable Battery – Quick Release Battery Pack
- Ring Quick Release battery – easy to charge removable battery.
- For all Ring Devices powered by Quick Release Battery.
- You’ll always have backup power.
- Operating conditions: -20.5°C to 48.5°C
- Dimensions :7 cm. x 4.5 cm. x 2.25 cm
New starting from: 24.99
Buy on AmazonChanging your Ring Doorbell’s WiFi connection might initially seem intimidating, but it’s manageable with the proper guidance. This guide has provided clear, easy-to-follow steps, troubleshooting tips, and advice for maintaining your device. Whether upgrading your home network or addressing connectivity issues, you can now ensure your Ring Doorbell remains a reliable home guardian.
Embrace the power of technology to enhance your home security and stay connected. Your Ring Doorbell is more than just a device; it’s your peace of mind, and with this newfound knowledge, you’re well on your way to mastering its capabilities.
If you’re seeking a Ring alternative, you’ll love our detailed Tapo TD21 video doorbell review. It dives into everything from battery life and wireless range to how it stacks up against Ring. This is especially helpful if you’re considering a switch in providers or Wi-Fi networks.
You Asked, We Answered: Ring Doorbell & Wi-Fi FAQs
-
How to connect Ring to WiFi?
In the Ring app, go to Devices → select your Ring → Device Health → Change Wi‑Fi Network or Reconnect to Wi‑Fi, and follow the setup mode instructions.
-
How to change WiFi on Ring Doorbell 2?
Same as above – choose your Ring 2 in the app, open Device Settings → Device Health → Change Wi‑Fi Network.
-
No option to change WiFi on Ring?
Up‑date the Ring app and firmware, then revisit Device Health. If missing, uninstall + reinstall the app or restart your device.
-
Ring Doorbell battery replacement?
Remove the quick‑release battery pack, charge it externally, then reinsert. Your Wi‑Fi settings remain intact.
-
How do I reconnect my Ring devices to my new Wi‑Fi?
Use Device Health → Change Wi‑Fi Network in the Ring app. Select the new SSID and enter the password without removing the device itself.
-
How do I reset a Ring Doorbell?
Hold the reset button on the back for 15 seconds until the light flashes. Re‑setup via the Ring app under “Set up a Device”.
-
Can I use a WiFi extender with my Ring doorbell?
Yes, WiFi extenders work well with Ring doorbells. Ensure the extender broadcasts on 2.4GHz and provides strong signal coverage to your doorbell location. Some users report better results with mesh network systems compared to traditional extenders.
-
How often should I change my Ring doorbell’s WiFi settings?
Only change WiFi settings when necessary: new router, password changes, or moving house. Frequent changes can cause temporary connectivity issues and may affect your doorbell’s learning algorithms for motion detection.
-
Will changing WiFi affect my Ring doorbell’s recordings?
No, existing recordings stored in Ring’s cloud service remain unaffected. However, your doorbell won’t record new events while disconnected from WiFi. The change process typically takes 5-10 minutes.
-
Can I connect my Ring doorbell to a mobile hotspot?
Yes, but it’s not recommended for permanent use. Mobile hotspots work for temporary situations but may have data limitations and less stable connections than home broadband.
-
What happens if my broadband goes down after changing WiFi?
Your Ring doorbell will attempt to reconnect automatically when internet service resumes. Battery-powered models continue recording locally during outages, uploading footage once connectivity returns.
-
Do I need to change WiFi settings for Ring Chime devices too?
Yes, Ring Chime and Chime Pro devices require separate WiFi setup. Change these devices through the same Ring app process, but they have their own setup procedures.
-
Can I use the same WiFi network for multiple Ring doorbells?
Absolutely. Most home networks support multiple Ring devices simultaneously. Ensure your router has sufficient bandwidth and consider upgrading to a mesh system for large properties with multiple doorbells.
*When you order through these links, we may earn a commission at no additional cost to you.
Comments are closed